Showing posts with label tutorial. Show all posts

Tuesday, September 10, 2013

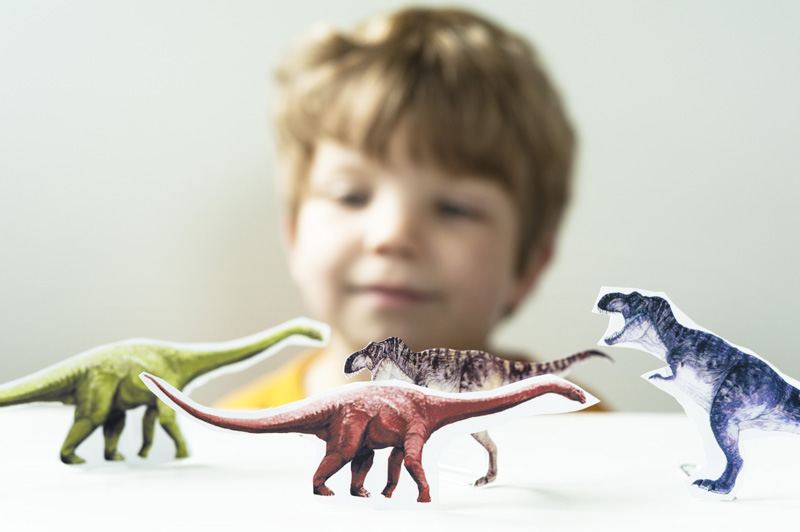
Tutorial Tuesday: Dinosaur "Action Figures" Your Kids Can Make!

This week I'm especially excited about our Dinosaur Vector Designs and Classic Racing Cars of the World collections because of they way they simply scream out to be incorporated into the decor of a children's bedroom. I started searching for ideas from blowing up a dinosaur huge and making a wall decal to decoupaging a lampshade with our zippy old-style race cars.

But, then I stumbled across this easy-peasy photo-tutorial on making stand up dino "action figures" by Made by Joel and I stopped dead in my tracks. It's so simple yet so perfect I knew I just had to share it.

How cute are these!

Says Joel:
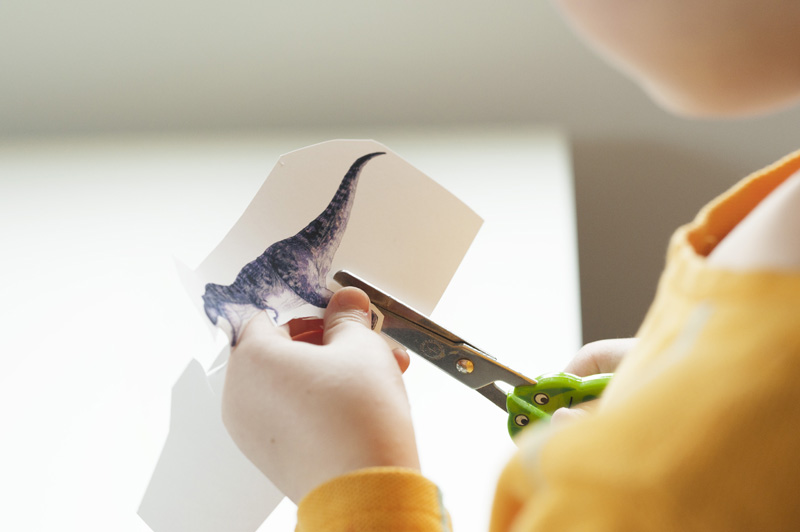
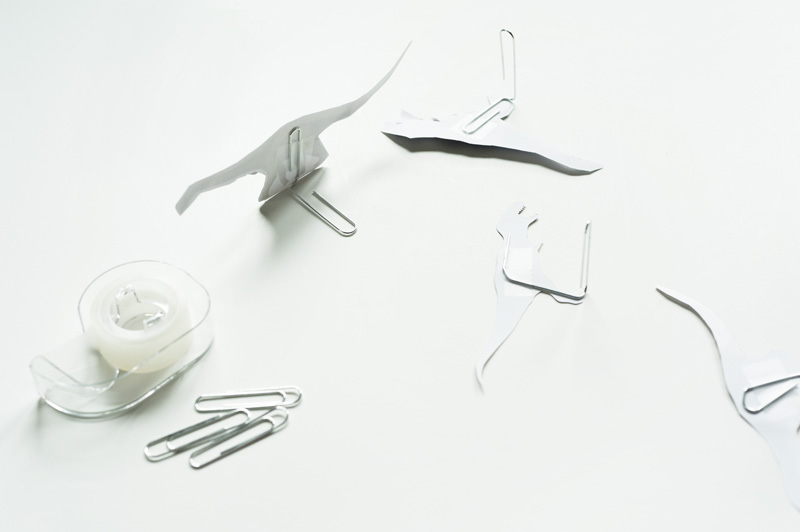
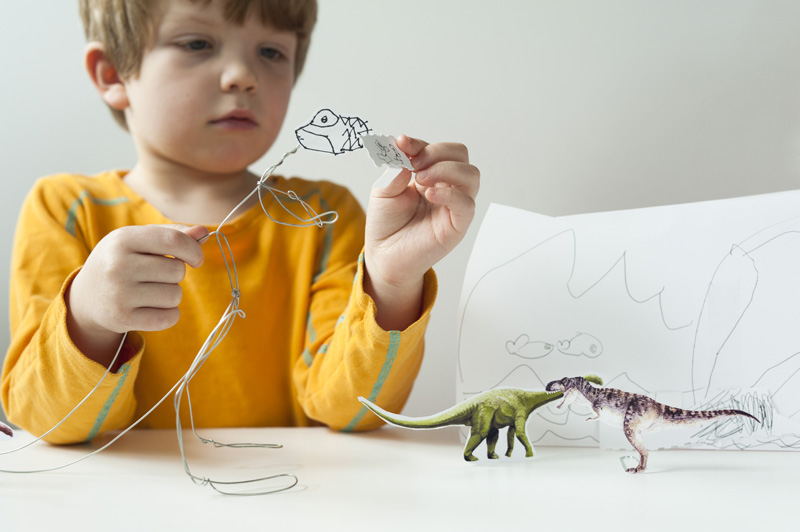
I just did an image search for dinosaurs and let my son pick out which ones he wanted to printout. Then he cut them out himself and we taped a bent paper clip to the backs of them so they could stand up. (See images below.) My daughter also drew a background which we stood up with bent paper clips. 
 

I love the idea of giving your child control of the safety scissors and letting him/her make these his/herself. (don't want to leave out the little ladies- I for one LOVED dinosaurs when I was small.)

Try this out yourself with both our our Dinosaur Vector Designs and Classic Racing Cars of the World collection...each individual image sheet is only $0.99! The dinosaurs even come in black and white so you can let your child decide what the dinos look like!

Tuesday, August 27, 2013

Tutorial Tuesday: Victorian Tussie-Mussie

While thinking about what tutorial to feature this week, I realized I couldn't imagine a project more utterly Victorian and suited to our clip art than the tussie-mussie.

Victorian Lady Tussie Mussies by Alice M. Wingerden on Flickr
A tussie-mussie is a small flower bouquet, often created using herbs and flowers with symbolic meanings, and wrapped in a decorative paper cone. While the term tussie-mussie comes from the Victorian era (1837–1901), nosegays and other small bouquets have been a popular gift since Medieval times.

Today, many crafters and artists create beautifully decorated tussie-mussie cones that can be filled with flowers, hung as an ornament, used as a unique wrapping for small gifts, or hung on a mantle as stockings at Christmas. Here's another example from Suzie Crafter Designs on YouTube:


Now, the challenge is that this project is SO simple, I'm not even sure how to put it together in a tutorial! You simply create the paper cone, and go wild embellishing to your heart's content! So, instead, here's a list of supplies

Here's what you'll need to create your own tussie-mussie cone:

Decorative paper cut into a square of approx. 12" x 12" (use a bigger square for a larger cone) You could use:

scrapbook background paper
sheet music
wallpaper
paper you've stamped, painted or printed yourself

Embellishments are limited only by your imagination! Of course, we recommend starting with any one of our vast selection of Victorian clip art, which you can use royalty-free. But you might also use:

scrapbook embellishments
silk or paper flowers
pearls or beading
tissue, lace, or other trim
jewels and jewelry bits

There you have it! What do you think? Will you be trying your hand at your own tussie-mussie? Tell us in the comments!

Tuesday, August 20, 2013

Tutorial Tuesday: Make Your Own Woodcut


Our 1930s Woodcuts of Travel clip art collection, now available on DoverPictura, is quickly becoming one of my new favorites. I love the texture of these striking images- they have such an organic feel. Curious about the art of woodcutting and woodblock printing, I began searching for a list of supplies (which I'll share below) and stumbled across this great little video depicting the whole process!


Looks fun, doesn't it? You can draw you own design or transfer your favorite image for DoverPictura and carve away!
 
Here's a basic list of the supplies you'll need to get started:
  • Small piece of wood - around 2-3" square will work nicely
  • Gravers and chisels for cutting - these can be found in the woodworking aisle of most craft stores
  • Printers ink - water or oil based, depending on your personal preference
  • Glass for spreading the ink
  • Roller for rolling the ink
  • Paper- you may choose to practice on scraps, but be sure to have some nice thick paper on hand for the final prints.
While this tutorial shows the final print being made with a book press, you can try using any heavy object, or you can place the paper on top of the wood block and rub the print onto the paper!

Friday, August 9, 2013

This Week's Winners and Some Alphabetical Inspiration


Congratulations to the winners of this week's featured collection giveaway, including
flipdoodle who said "I love letters which take the form of animals best." We hope you create something wonderful with Letters and Alphabets! (and better yet, come back and share your results!)

Stuck in a creative rut? Let's get your creativity back to the ABCs with these simple tutorials that use letters in a variety of media:

Decoupage Letter tutorial from the letter k

Moss Monogram from Eight by Five


Vintage sheet music "Joy" sign from An Oregon Cottage


iPhone/Computer Wallpaper from Primp and Paper


Monogram Mugs from Design Mom

Tuesday, August 6, 2013

Tutorial Tuesday: Carmen's Carved Eraser Veggie Stamps and Notecard Set


Today's tutorial comes from our awesome Dover Crafting Ambassador, Carmen Flores Tanis, who gets us all in the back-to-school mood with some adorable little stamps made from erasers! (We've abbreviated things a bit, but you can read the full tutorial on Carmen's website.) 

Take it away, Carmen!


It is so easy to carve rubber erasers into little stamps and an easy way to add artwork to the stamps is to use clipart.

You'll need:
Instructions: 


1. Select your image: Instead of hauling out my heavy scanner, I just photographed the page with my iPad. I then used the ArtStudio app to size and flip the artwork so that it would fit on the erasers. (Be sure to flip your artwork so that it prints correctly!)

(DoverPictura note: the artwork Carmen uses in her tutorial comes from one of our out-of-print books that's not yet available on DoverPictura, but if you scroll to the bottom of this post you'll see some great suggestions for collections that feature similar art!)


2. Transfer image onto rubber eraser: I transferred the veggie artwork onto the eraser by using a piece of carbon paper and a pencil. Then I used a kraft knife with a sharp blade to carve away the extra rubber so that just the veggie outlines remained. (You could use a Speedball linoleum cutter but I prefer a kraft knife to get really precise cuts.) After a few minutes, the stamp was carved and ready for printing!


3.  Carefully carve your stamps: Stamp carving is addictive so of course I had to make a whole set of stamps!


4. Print:
I printed the stamps on blank white index cards using ink pads in blue and black. (I also cut away the extra rubber around the outside of each stamp to keep from accidentally printing unwanted areas.)


5. Color:
I printed the little girl on the envelope flaps and added color to all the printed images with colored pencils. Easy!

6. Add finishing touches:
As a finishing touch, I made a band to wrap around my new stationery. I cut a strip of green construction paper and after stamping the checkerboard pattern on it with blue ink, wrapped it around the bundle of notecards and envelopes. Finally, I used a Kool Tak adhesive pad to adhere a copy of the little girl onto an orange construction paper rectangle and then attached that to the green strip with another adhesive pad.

------------------------------

Suggested images for this project:

Whimsical Animals Illustrations 0486999734 $12.99

Denslow's Wizard of Oz Illustrations 0486991466 $12.99
Old-Fashioned Children Illustrations 0486995933 $12.99


Monday, July 22, 2013

Tutorial: From Clip Art to Knitting Chart


Hi! I’m M. C. Waldrep, needlework enthusiast and editor-in-chief of Dover Publications. There are only 155 days until Christmas...and every year I formulate ambitious plans to start making all of my Christmas gifts in July! Well this year, inspired by the great images on DoverPictura.com, I am determined to do it – and at the same time demonstrate how you can turn a piece of clip art into a knitting chart with just a printer and Photoshop Elements.


For my Christmas gift, I decided to make knitted pillows for a friend who just bought a new house. Because her new living room has a nautical theme, I thought a scallop shell was the perfect motif for her pillows.

I found a great shell in the Nature Stencil Designs collection (sheet 45). For my yarn, I chose Caron’s Simply Soft. I decided I wanted the shell to be about 10 to 10½ inches wide to make a 14-inch square pillow. Since the original image is close to square, the height would be about 10 inches as well. My first step was to knit a swatch to determine my gauge, which worked out to be 5 stitches and 6½ rows to an inch. This meant that my shell would be about 50 stitches wide.

The easiest way to get the image onto a grid is to print it onto knitter’s graph paper. Since a knit stitch is wider than it is tall, knitter’s graph paper has rectangles, not squares (Fig. 1). You can find the paper in some knit stores and online. Some sites even let you create the paper to your exact gauge rather than to a standard proportion.

Printed graph paper


Most of the graph paper is sized to fit on a letter size sheet of paper, so my shell was not going to fit on a single sheet at actual size. So, a little arithmetic was called for. Since I had already determined that my shell would be about 50 stitches wide, I measured the printed graph paper to see how wide 50 stitches would be. On my sheet 50 stitches measured a shade under 6¼ inches.


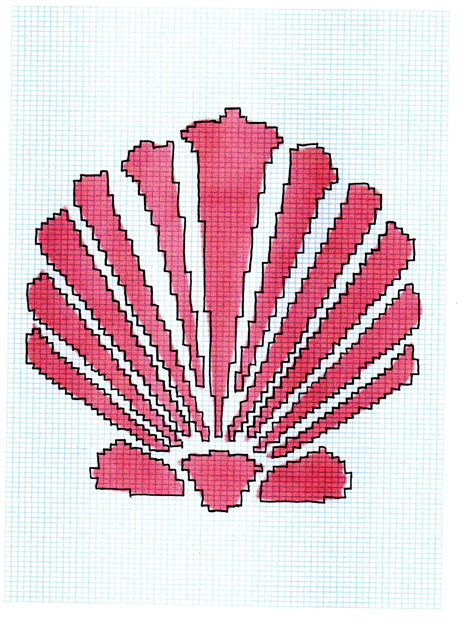
I opened my image in Photoshop Elements and cropped the image as close as possible to edges of the actual motif, eliminating any white space. I resized the image to 6¼ inches wide (keeping the ratio of the width and height linked). Because I wanted to see the underlying grid on the printed chart, I recolored the image to medium red.

Then I printed the image onto the graph paper (Fig. 2).


However, as you can see (Fig. 3), I still had a bit of work to do. 


Whenever you place a curved design on a rectangular grid, you will have to make adjustments. In this case the shell often covered only part of a rectangle, and I had to decide whether to make the stitch colored or plain. I outlined the edge of the motif with a felt tip marker to define the areas of color. This may sound tedious, but it makes the knitting so much easier. As I outline, I can tweak the chart to get the result I want. (Fig 4)


Now I was ready to start knitting. I worked up the design in two versions so you can see the different effects you can achieve.


On the solid color pillow, the shell is defined by texture alone – a stockinette stitch shell on a reverse stockinette background.


A third color could easily be added to the multicolor pillow by closing in the outer edge and working the ribs in a darker or lighter shade of coral. I also think this particular design would look beautiful with the shell worked in a variegated yarn.


The  method I used works best on simple designs with very clearly defined shapes. If you want to try more complicated designs with more colors, make your design larger and use thinner yarn so you have more stitches to work with. The larger your motif in relation to your gauge, the more detail you can add.

Now that you know how to create your own chart, you can use them to guide you through many other types of crafting projects, too – everything from tile work to needlepoint to painting!

- New to DoverPictura? Take advantage of our registration bonus. Click here to register and get three free image sheets!

Tuesday, July 16, 2013

Tutorial Tuesday: Catch of the Day Pencil Holder

Today's tutorial comes from one of our favorite craft blogs, Mod Podge Rocks!


The dedicated fisherman or outdoorsman in your life will love this quirky pencil holder. And it's surprisingly simple to make- you just need some wood, a drill, paint and, of course, clip art!

While this particular piece uses fish from our Sea Life collection, there are a number of fishy images in  this week's featured collection, The Great Outdoors, that work just as well- if you want to put your own special touch on this fun project.